$800
This is a full rig, by the book, from the landing gear motor to the tires. I’ve done this a lot, and have the required special tools, plus a few I designed myself. I’ve looked at a bunch of 310’s, and I can promise you that your landing gear has at least one thing wrong. They all do. Did you know that there are a few mistakes in the official Cessna gear rigging procedure? Yep…
Options for Landing Gear Rigging:
Reseal leaking strut: $100/strut (labor only, parts extra)
Drop the main struts & inject grease into the trunnion bearings: $300 (both sides)
The main gear trunnion bearings are the bearings that are pressed into the wing spar, and hold the main gear strut to the wing. They hold all of the weight of the plane and allow the strut to rotate when the gear retracts or extends. Cessna never intended for these planes to last more than 10 years, so they never provided a way to lubricate these critical bearings. In every 310 I see, these bearings are completely dry. Some are frozen and the shaft is turning against the bearing’s inner race, which is not a good thing. So I designed and built a special tool which injects grease into the bearing.
The Service Manual makes no mention of these bearings but the manual does state to lubricate the nose strut bearings every 3 years. So I think that’s a reasonable time for the mains also.
Remove nose strut and grease trunnion bearings: $600
These bearings don’t require any kind of special tool, but the nose strut must be completely removed. And it’s not an easy job. Cessna says this should be done every 3 years.
Remove nose strut torque tube & bellcrank, lubricate & reinstall: $400
This torque tube lives in the aft, left side of the nose wheel well. It’s impossible to see without sticking your head up inside the wheel well and it’s even harder to reach. The problem is that this torque tube runs on open needle bearings and are completely exposed to whatever dirt and rainwater is thrown up there by the nose wheel. It’s impossible to rig the nose strut if these bearings are rusty and/or frozen. Which they usually are. I’ve seen a few 310’s where these bearings had completely disintegrated. Cessna says this should be done every 3 years. At the same time, I’ll remove the nose gear bellcrank that lives under the floor, right under the pilot’s feet. It runs on bronze bushings, not bearings, and needs to be lubricated. While I have it out, I’ll install a Zerk fitting (as Cessna should have done) so that this part can be lubricated with a grease gun in 30 seconds and never needs to come out again.
Lubricate the Reduction Gear Box: $300
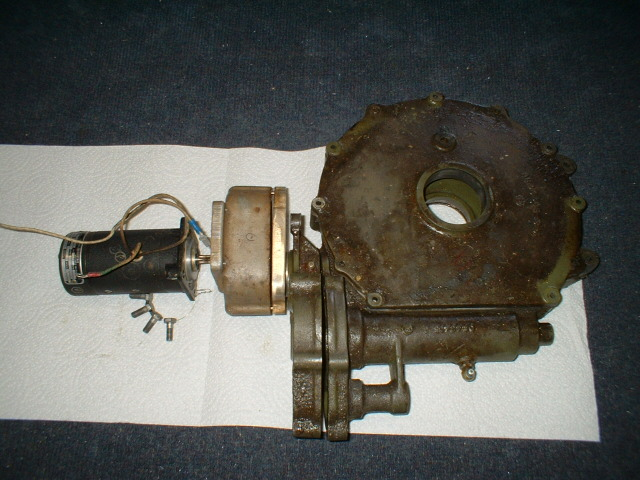
Motor, Gear Box, Actuator
Let me explain… there is seldom any reason to disassemble the motor. They either work or they don’t. And they are very tricky to reassemble. So if they don’t work, I send them to an aircraft electric motor repair shop.
The actuator, which is the large, mostly round part that the push-pull rods attach to, are greased thru the zerk fittings so they seldom have a problem. However, if yours does have a problem, I know how to take them apart and fix them. Now the gear box, located between the motor and the actuator, is a different story…
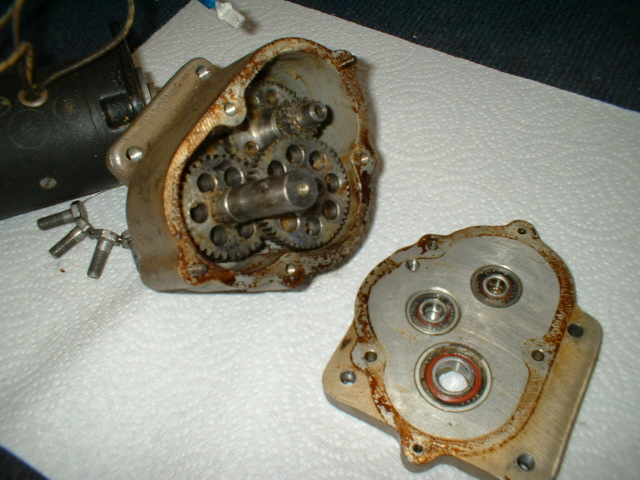
The reduction box is a small aluminum box that contains a gear set which reduces the electric motor’s 9000 RPM to something useable by the actuator. It was packed with grease at the factory, and there is NO way to grease it without disassembly. Think about it… that grease in there might be as much as 68 years old; how good can it be? In every one of these boxes that I take apart, the grease has turned to the consistency of candle wax… hard and useless. I highly recommend letting me do this for you. For reference, the Cessna Service Manual says to clean and repack with low-temperature grease every 1500 hours, but I certainly wouldn’t let it go longer than 10 years.